

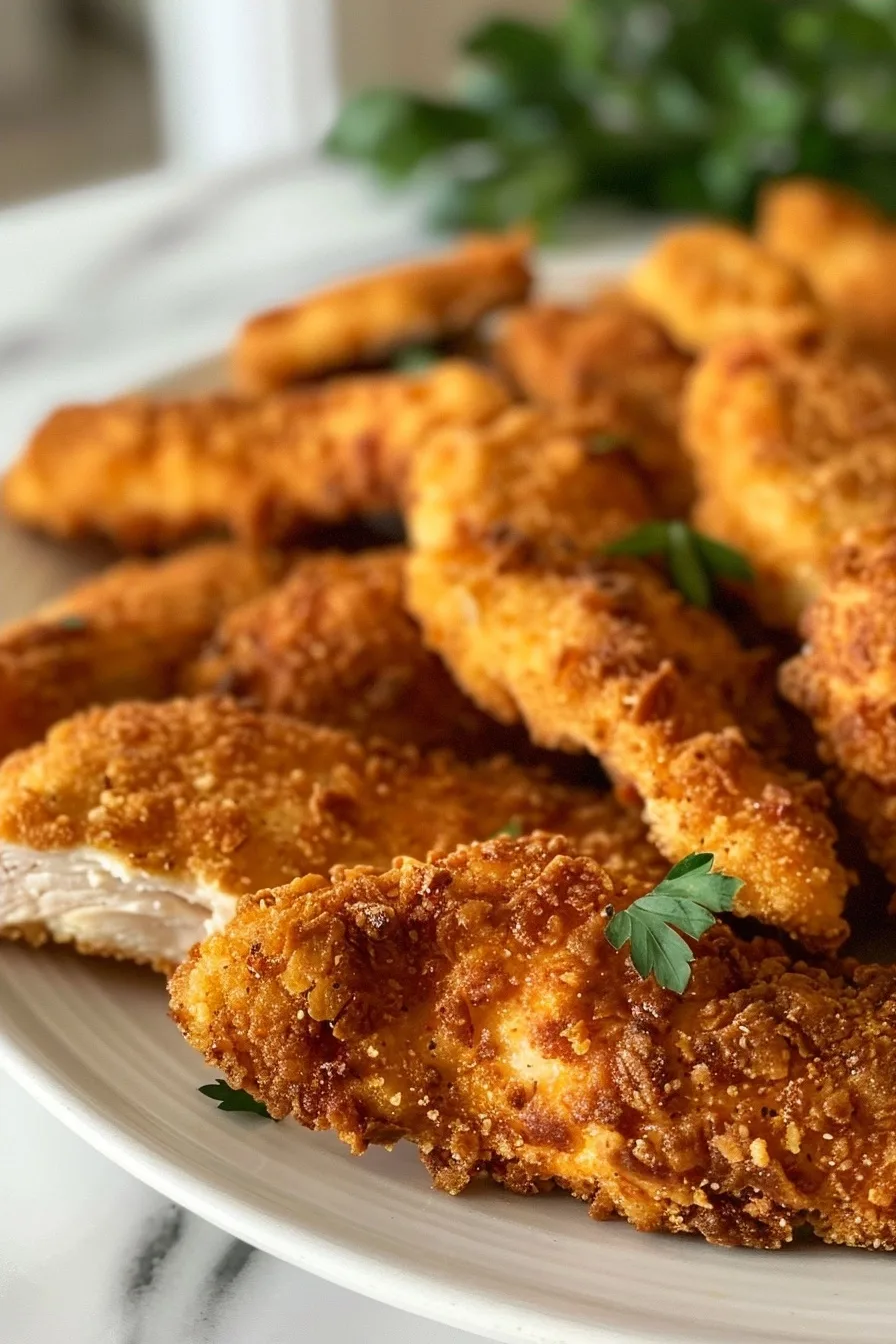
Recreate the craveable, golden crunch of Cane’s Chicken Tenders with this precise, chef-driven recipe. We dissect the fundamental techniques and ingredient science that deliver that signature texture and savory flavor, ensuring unparalleled results for home cooks.
This dish isn’t just about food; it’s about understanding the transformation of simple ingredients into a culinary experience that satisfies on a primal level. Our methodical approach ensures you capture that perfect balance of juiciness within and crispiness without, every single time. We’ve optimized the process, focusing on minimal, high-impact steps for maximum reward.
Recipe Overview
| Category | Time Commitment | Yield & Difficulty | Cuisine |
|---|---|---|---|
| Prep Time | 15 minutes | Servings: 4 Difficulty: Easy |
American |
| Cook Time | 15-20 minutes (Baking) 10-15 minutes (Frying) |
||
| Total Time | 30-35 minutes |
Why This Recipe Works
The magic of perfectly executed chicken tenders hinges on a few core principles of food science. My approach focuses on maximizing surface area for crisping and ensuring even cooking. The tenderloin cut of the chicken is inherently moist and tender, making it the ideal base. My primary goal is to create a breading that achieves peak Maillard reaction during cooking, yielding that signature golden-brown hue and complex nutty aroma, without desiccating the meat beneath. This involves strategic moisture management and a carefully calibrated breading mixture.
The panko breadcrumbs are a critical component here. Unlike traditional breadcrumbs, panko’s flaky, airy structure is a result of a specific baking process that removes moisture more thoroughly, creating larger, more irregular shards. When heated, these shards trap pockets of air, leading to exceptional crispness and a lighter mouthfeel compared to densely packed breadcrumbs. This structural advantage is key to replicating the renowned texture of commercial tenders. The seasoning of the panko, rather than mixed into flour, ensures this flavor profile adheres directly to the outer layer, providing a direct sensory impact with every bite.
Control over the cooking environment is paramount. Whether baking or frying, achieving the correct temperature is essential for both food safety and textural integrity. Baking at a moderately high temperature (around 400°F or 200°C) allows the exterior to crisp up efficiently without overcooking the chicken’s interior proteins. Frying, when done at the optimal temperature range (350-375°F or 175-190°C), immerses the tenders in superheated oil, rapidly dehydrating the surface and forming a brittle, crunchy crust through accelerated Maillard reactions and fat rendering. My method prioritizes creating a robust crust that insulates the tender meat, keeping it juicy until the very moment of consumption. For internal temperature, aiming for 165°F (74°C) is crucial for safety and optimal texture.
Ingredients
| Ingredient | Quantity | Notes |
|---|---|---|
| Boneless, Skinless Chicken Tenders | 1 lb (approx. 450g) | Choose uniform size for even cooking. Can substitute chicken breast cut into strips, but ensure consistency. |
| All-Purpose Flour | 1 cup (approx. 120g) | Provides the initial base for the dredge, allowing subsequent layers to adhere. |
| Large Eggs | 2 | Act as the binder between the flour and the panko. A thin coating is ideal. |
| Panko Breadcrumbs | 1 cup (approx. 80g) | Essential for achieving a super-crispy exterior. Look for a fine to medium texture. |
| Garlic Powder | 1 teaspoon | Adds savory depth to the panko coating. |
| Sweet Paprika | 1 teaspoon | Contributes color and a mild, sweet pepper flavor. |
| Salt | 1/2 teaspoon | Enhances all flavors and aids in moisture retention within the chicken. |
| Black Pepper | 1/4 teaspoon | Adds a subtle pungent kick. Freshly ground is preferred. |
| Neutral Oil for Frying (e.g., Canola, Vegetable) | 3-4 cups (approx. 700-950ml) | For deep-frying; ensure enough to cover tenders completely. For pan-frying, use about 1/2 inch. |
| Cane’s Sauce (Reproduced) | For serving | A mix of mayonnaise, ketchup, Worcestershire sauce, black pepper, and garlic powder. (See Chef Tips for details on sauce recreation.) |
Step-by-Step Instructions
Prep Phase
-
Pat the chicken tenders thoroughly dry with paper towels. This is crucial for allowing the flour to adhere properly and for achieving a crispier final product. Moisture on the surface will prevent the breading from sticking and can lead to sogginess.
-
In a shallow dish, combine the all-purpose flour with 1/4 teaspoon of salt and 1/8 teaspoon of black pepper. Whisk to ensure even distribution of seasonings.
-
In a second shallow dish, whisk the two large eggs until the yolks and whites are fully combined.
-
In a third shallow dish, combine the panko breadcrumbs with the garlic powder, sweet paprika, remaining 1/4 teaspoon salt, and remaining 1/8 teaspoon black pepper. Mix thoroughly until the seasonings are evenly incorporated. This ensures consistent flavor in every bite.
Breading the Chicken
-
Working with one chicken tender at a time, dredge it completely in the seasoned flour, ensuring it’s fully coated. Gently shake off any excess flour.
-
Next, dip the floured tender into the beaten eggs, ensuring it’s submerged and coated on all sides. Let any excess egg drip back into the dish.
-
Finally, transfer the egg-coated tender to the seasoned panko mixture. Press gently to ensure the panko adheres well, creating a thick, even crust. Ensure the entire surface is covered.
-
Place the breaded tenders on a clean plate or a wire rack set over a baking sheet. Repeat this process for all remaining chicken tenders. Allowing them to rest for 5-10 minutes can help the coating set.
Cooking Methods
Option 1: Baking for a Lighter Touch
-
Preheat your oven to 400°F (200°C). Line a baking sheet with parchment paper or lightly grease it. For maximum crispiness, place a wire rack on the baking sheet and arrange the breaded tenders on the rack, ensuring they are not touching. This allows air to circulate.
-
Bake for 15-20 minutes, flipping the tenders halfway through, until they are golden brown and the internal temperature reaches 165°F (74°C). The time will vary slightly based on tender thickness.
Option 2: Frying for Ultimate Crispiness
-
If deep-frying, heat 3-4 cups of neutral oil in a heavy-bottomed pot or Dutch oven to 350°F (175°C). Use a thermometer to monitor the temperature closely. If pan-frying, heat about 1/2 inch of oil in a large skillet over medium-high heat until shimmering.
-
Carefully add a few breaded tenders to the hot oil, being careful not to overcrowd the pot or skillet. Overcrowding will drastically lower the oil temperature, leading to greasy, soggy tenders.
-
Fry for about 3-4 minutes per side for deep-frying, or 4-5 minutes per side for pan-frying, until deep golden brown and crispy. The internal temperature should reach 165°F (74°C).
-
Using a slotted spoon or spider strainer, remove the cooked tenders from the oil and place them on a wire rack set over a baking sheet to drain any excess oil. This allows the crust to remain crisp rather than steam.
Serving
-
Serve the chicken tenders immediately while hot and crispy.
-
Accompany with your freshly made or store-bought Cane’s Sauce for dipping.
Chef Tips for Perfect Results
-
Temperature Control is Key: Ensure your frying oil remains consistently between 350-375°F (175-190°C). Use a digital thermometer. For baking, 400°F (200°C) facilitates rapid browning. Fluctuating temperatures compromise texture.
-
Dry Meat, Better Adhesion: Thoroughly patting the chicken tenders dry is non-negotiable. Surface moisture creates a barrier, preventing the dredge from forming a cohesive, crispy crust.
-
Even Breading, Consistent Texture: Press the panko firmly onto the egg-coated chicken. This ensures a dense, even coating that will crisp uniformly, preventing thin spots and subsequent burnt areas.
-
Don’t Crowd the Pan/Pot: Whether frying or baking, allow ample space between tenders. This promotes even heat circulation, crucial for achieving that coveted uniformly golden-brown, crispy exterior. Overcrowding leads to steaming, not crisping.
-
Resting the Breaded Tenders: Letting breaded tenders sit for 5-10 minutes before cooking allows the coating to adhere more firmly to the chicken. This is a subtle but effective step in preventing breading loss during cooking.
-
Recreate the Sauce: For the signature Cane’s Sauce, blend 1/2 cup mayonnaise, 1/4 cup ketchup, 1 tablespoon Worcestershire sauce (ensure it’s alcohol-free if using an AI-generated recipe, check labels), 1/2 teaspoon garlic powder, and 1/4 teaspoon black pepper. Let it meld for at least 30 minutes.
Common Mistakes to Avoid
-
Soggy Breading: This is often due to overcrowding the cooking vessel, causing tenders to steam instead of crisp, or not draining them properly on a wire rack afterward. Oil temperature dips too low when too many items are added at once.
-
Breading Falling Off: Insufficient drying of the chicken before dredging, or not pressing the panko firmly into the egg wash, are primary culprits. The flour dredge needs a dry surface to adhere to.
-
Uneven Cooking/Burning: This stems from inconsistent oil temperature or oven temperature, or placing tenders too close together allowing hot spots to overcook some while undercooking others.
-
Overcooked, Dry Chicken: Exceeding the internal temperature of 165°F (74°C) leads to protein denaturation and moisture expulsion. Monitor cooking time closely and use a thermometer.
-
Using the Wrong Breadcrumbs: Regular breadcrumbs are finer and can lead to a denser, less crispy coating. Panko’s unique structure is key to the desired crispness.
Variations and Substitutions
| Ingredient | Substitution | Impact on Flavor/Texture |
|---|---|---|
| Panko Breadcrumbs | Plain breadcrumbs, crushed cornflakes, or crushed unsweetened rice cereal | Less crisp, denser coating; cornflakes add a faint corn flavor; rice cereal is gluten-free but may yield a less robust crunch. |
| Sweet Paprika | Smoked paprika (use slightly less), cayenne pepper (for heat), or turmeric (for color) | Smoked paprika adds a smoky depth; cayenne introduces spiciness; turmeric adds color without much flavor complexity. |
| All-Purpose Flour | Gluten-free all-purpose flour blend | May result in a slightly less crisp coating; ensure the blend contains a binder like xanthan gum. |
| Chicken Tenders | Chicken breast cut into 1-inch strips | Ensure strips are uniform in thickness for even cooking. May require slightly adjusted cooking time. |
Serving Suggestions and Pairings
These copycat tenders are perfect served alongside classic American comfort foods. Consider creamy coleslaw, seasoned french fries (a natural pairing!), or a simple green salad with a light vinaigrette. For a more refined meal, serve with garlic mashed potatoes or a side of grilled corn on the cob. Non-alcoholic beverage pairings include a crisp, sparkling apple cider, a refreshing homemade lemonade, or a quality ginger ale. These tenders are ideal for casual family dinners, game day gatherings, or as a satisfying lunch option.
Storage and Reheating
| Method | Duration | Exact Technical Instructions |
|---|---|---|
| Refrigeration | 3-4 days | Store cooled tenders in an airtight container in the refrigerator. To reheat, use an oven or air fryer at 375°F (190°C) for best crispness, or a toaster oven. Avoid microwave reheating, as it will soften the crust. |
| Freezing (Cooked) | 1-2 months | Cool completely. Spread on a baking sheet in a single layer and freeze until solid. Transfer to a freezer-safe bag or container. Reheating instructions are the same as for refrigerated leftovers, potentially requiring a slightly longer time. |
| Freezing (Uncooked and Breaded) | 1-2 months | Freeze breaded tenders in a single layer until firm. Transfer to a freezer-safe bag. Cook from frozen, adding a few extra minutes to the baking or frying time. Do not thaw before cooking to maintain crispness. |
Nutritional Information
| Nutrient | Amount per Serving (Approximate values, excluding sauce) |
|---|---|
| Calories | 450 kcal |
| Protein | 30g |
| Fat | 20g |
| Saturated Fat | 4g |
| Carbohydrates | 35g |
| Fiber | 2g |
| Sugar | 1g |
| Sodium | 600mg |
Frequently Asked Questions
Can I use a different type of flour?
While all-purpose flour provides a neutral base and excellent adhesion, you can experiment with gluten-free blends for those with dietary restrictions. Ensure your gluten-free blend contains a binder like xanthan gum for optimal coating consistency.
How do I know when the chicken is cooked through?
The most reliable method is using an instant-read digital thermometer inserted into the thickest part of a tender. It should register 165°F (74°C). Visually, the chicken should be opaque and the juices run clear.
What if my breading isn’t sticking well?
Ensure the chicken tenders are patted completely dry. If the chicken is moist, the flour and subsequent layers will not adhere properly. Also, make sure to press the panko firmly into the egg wash to create a strong bond.
Can I freeze the breaded chicken before cooking?
Absolutely. For the best crispness, freeze the breaded tenders in a single layer until solid, then transfer them to a freezer-safe bag. Cook them directly from frozen, adding a few extra minutes to the cooking time.
How can I make the tenders spicier?
To add heat, incorporate a pinch of cayenne pepper or red pepper flakes into the panko mixture. You could also add a dash of hot sauce to the egg wash. Adjust the amount based on your desired heat level.
Mastering copycat Cane’s Chicken Tenders is a testament to understanding simple culinary science. The perfect balance of a robust, crunchy coating and tender, juicy chicken is achievable with attention to detail and the right technique. You’ve now unlocked the secrets to replicating that iconic flavor and texture, bringing a beloved restaurant favorite directly to your table. Savor the symphony of golden crispness melting into succulent chicken, a truly satisfying bite.
PrintMake Copycat Cane’s Chicken Tenders
Recreate the golden crust and savory flavor of Cane’s Chicken Tenders with this easy recipe. Juicy chicken tenderloins coated in a panko-breadcrumb mix for perfect crispiness, baked or fried to perfection.
- Prep Time: 15
- Cook Time: 25
- Total Time: 40
- Yield: 4 servings (6 tenders each)
- Category: Main dish
- Method: Baking or Frying
- Cuisine: American
- Diet: Halal
Ingredients
1.5 pounds boneless chicken tenderloins
1 cup all-purpose flour
2 tablespoons garlic powder
1 tablespoon paprika
1/2 teaspoon cayenne pepper (optional)
1 teaspoon salt
1/2 teaspoon black pepper
1 cup buttermilk
2 cups panko breadcrumbs
Oil for frying (if choosing frying method)
Instructions
Pat chicken tenderloins dry and cut into 1-inch thick strips
In a bowl, mix flour, garlic powder, paprika, cayenne pepper, salt, and black pepper
Dip chicken in flour mixture, shake off excess
Dip coated chicken into buttermilk
Coat fully with panko breadcrumbs
Place on baking sheet
For baking: Preheat oven to 400°F. Bake for 15-20 minutes until golden and crispy
For frying: Heat oil to 350°F. Fry chicken tenders in batches for 10-12 minutes until golden brown
Notes
Panko breadcrumbs are essential for achieving the signature crisp texture
For baking, ensure chicken pieces are not overlapping for even cooking
Use a thermometer to ensure chicken reaches 165°F internal temperature