

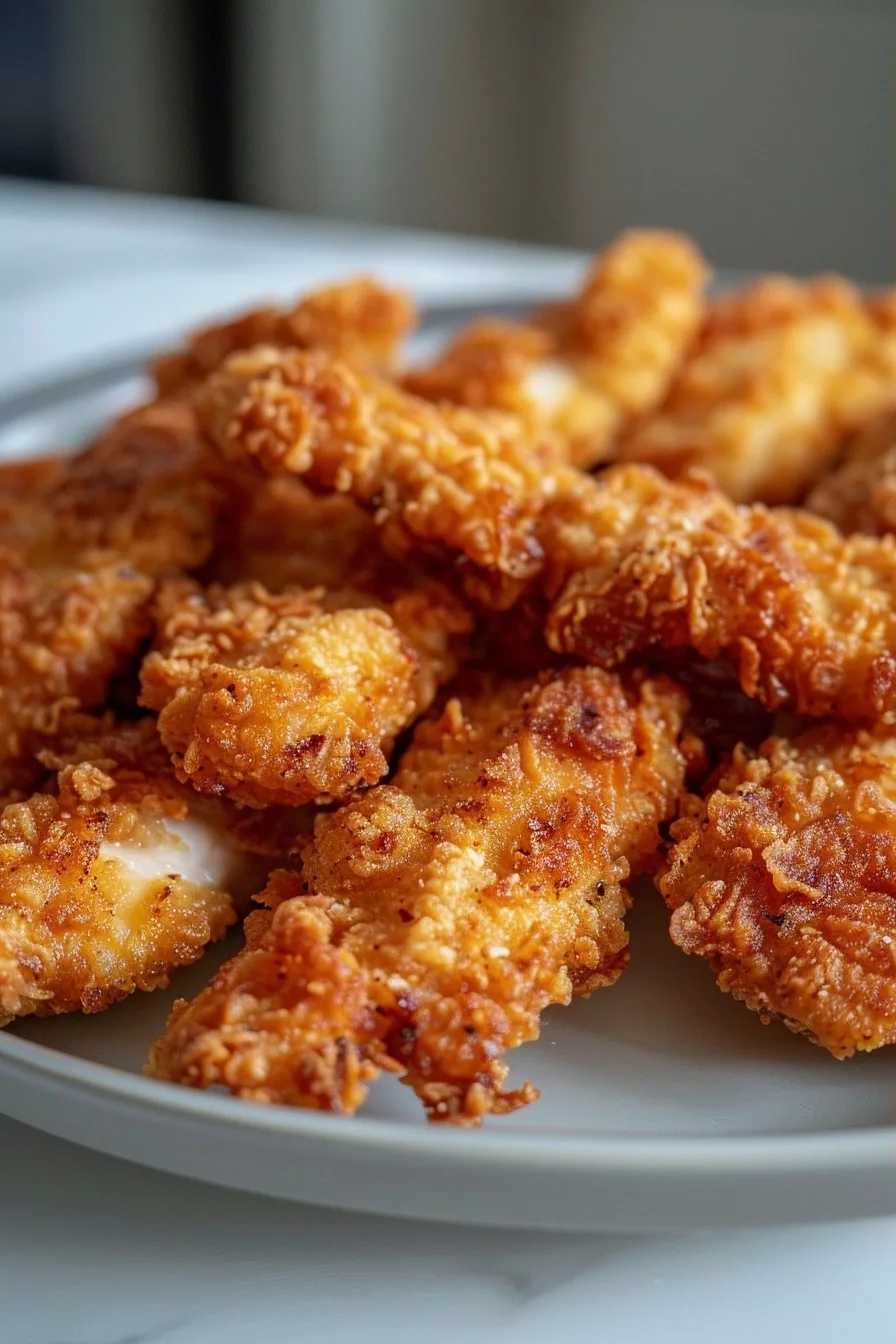
Gluten-Free Crispy Chicken Tenders are a delicious, easy-to-make meal that delivers the crunch and flavor of restaurant-style chicken, minus the gluten or additives. Whether you’re dining in or hosting, these tenders are a perfect, allergy-friendly solution to satisfy any craving.
| Prep Time | 15 mins |
|---|---|
| Cook Time | 20 mins |
| Total Time | 35 mins |
| Servings | 4 |
| Difficulty | Easy |
| Cuisine | American |
Why This Recipe Works
One of the biggest challenges in making great homemade chicken tenders lies in achieving proper texture: crispy on the outside while remaining juicy on the inside. This recipe makes it happen by leveraging the unique properties of gluten-free flour and cornflakes. Gluten-free flour acts as an excellent browning agent due to its low protein content, creating a golden crust without the stickiness of regular wheat flour.
The key to a deep, nutty flavor comes from crushing gluten-free cornflakes—these add both crunch and a touch of sweetness that complements the proteins in the chicken. The cornflakes also work as a mechanical crunch enhancer because of their porous structure. When baked, they expand and form a crispy exterior. Additionally, their subtle corn character adds depth to the overall flavor, making each bite interesting without being overly sweet.
Finally, the double-layer coating of flour and egg ensures that the chicken isn’t just browned—but fully encapsulated in a crust. This not only locks in moisture but also gives a more uniform texture that’s hard to achieve with a single breading. The combination of these ingredients and techniques guarantees a result that’s restaurant-quality, easy on the body, and completely free from common allergens.
Ingredients
| Ingredient | Quantity | Notes |
|---|---|---|
| Chicken tenders | 1 lb (450 g) | Look for fresh, boneless tenders; frozen is okay if thawed completely |
| Gluten-free flour | 1 cup (120 g) | Choose a corn or rice-based option; avoid soy-based flours |
| Crushed gluten-free cornflakes | 1 cup (50 g) | You can pulse cornflakes in a food processor for an even texture |
| Eggs | 2 large | Use at room temperature for better binding |
| Salt | 1 teaspoon | Adjust to taste; sea salt or kosher salt preferable |
| Black pepper | 1/2 teaspoon | Opt for freshly ground pepper for more depth |
Step-by-Step Instructions
Prep
-
Preheat oven to 400°F (200°C). Line a baking sheet with parchment paper for easy cleanup and even baking.
-
Place gluten-free flour and salt in a large bowl. Set aside for breading.
-
Crush the cornflakes into small pieces by hand or in a food processor (pulse 3–4 times). Transfer to a second bowl with pepper. This forms your crunchy coating.
-
Crack the eggs into a shallow bowl, whisking quickly to break up the whites. This helps the breading adhere better.
Breading and Baking
-
Working one at a time, coat each chicken tender in the flour mixture, shaking off any excess. Then dip it in the egg, making sure it’s fully coated.
-
Press the chicken gently into the cornflake mixture to ensure even coverage. Flip and repeat for the other side.
-
Arrange the breaded tenders in a single layer on the prepared baking sheet, making sure they’re spaced out so they don’t touch. This promotes even heat distribution.
-
Bake for 18–20 minutes, flipping halfway through, until the tenders are golden brown and fully cooked (internal temperature of 165°F or 74°C at the thickest part is ideal).
Rest and Serve
-
Let the tenders rest for at least 2–3 minutes before serving to let the juices redistribute.
-
Serve with your favorite sides and sauces, like a honey mustard drizzle or a tangy ranch. The tenders are perfect as is but even better with a touch of sauce.
Chef Tips for Perfect Results
-
Keep the chicken dry: Pat the tenders with paper towels before breading. Wet chicken will compromise the coating and lead to a soggy crust.
-
Use the right flour: Choose a gluten-free flour high in starch like corn or rice. Avoid flours with high protein content, such as soy-based flours, as they can create a gummy coating.
-
Don’t overcrowd the baking sheet: Too many tenders baked together trap moisture, resulting in uneven browning and a less crispy final outcome.
-
Measure your cornflakes properly: A coarser texture means better crunch. Avoid over-processing them into a powder, as that can reduce texture.
-
Use an instant-read thermometer: Insert into the thickest part of the tender for optimal doneness at 165°F (74°C). This ensures the chicken is safe to eat and still juicy.
Common Mistakes to Avoid
-
Overcoating the chicken: Too much flour or cornflake can lead to an overly thick and heavy crust. The ideal coating should be evenly distributed but not excessive. Solution: Shake off any excess before pressing.
-
Not flipping during baking: Failing to flip halfway through can result in uneven crisping. Solution: Always flip if possible.
-
Using old flour: Expired or stale gluten-free flour will lose its crisp-forming qualities. Solution: Use flour that’s within its expiration and stored properly in an airtight container.
-
Skipping the resting time: Jumping on the chicken too soon will release the juices, leaving them dry. Solution: Allow full rest time before slicing or serving.
Variations and Substitutions
| Ingredient | Substitution | Impact on Flavor/Texture |
|---|---|---|
| Gluten-free flour | All-purpose flour (traditional) | Provides gluten strength for better coating structure and browning. |
| Crushed cornflakes | Crushed gluten-free rice cereal or bread crumbs | Provides similar texture and slight variation in flavor. |
| Eggs | Flax eggs (1 tbsp flax + 2.5 tbsp water, let sit 5 min) | May not bind as tightly; works best when fully flax-based coating is used. |
| Chicken tenders | Sliced chicken breast or thighs | Will take longer to cook but provide more surface area for coating. |
Serving Suggestions and Pairings
Gluten-Free Crispy Chicken Tenders are incredibly versatile in both casual and elevated settings. Here are some serving ideas to match any dinner:
-
Pair with nacho-style baked sweet potato fries for a heartier, satisfying combination that’s naturally gluten-free.
-
Serve with a side of buttered spinach or sautéed kale to balance the richness and add fiber.
-
Add a drizzle of maple-Dijon glaze for a slightly sweet contrast that enhances the savory flavors of the chicken.
-
For a lighter option, top with avocado slices and a squeeze of lime, keeping things fresh while still showing off the chicken’s crispness.
-
These tenders also make a great main on a grain-free wrap with guacamole or salsa for a portable, on-the-go meal.
Storage and Reheating
| Method | Duration | Exact Instructions |
|---|---|---|
| Refrigeration | 2–3 days | Cool completely before placing in an airtight container. To reheat, warm at 375°F (190°C) for 8–10 minutes or until warm and crisp again. |
| Freezing | Up to 3 months | Cook the tenders first, let them cool, then place in a sealed freezer bag. Reheat directly from freezer at 400°F (200°C) for 12–15 minutes. Add a little parchment with a teaspoon of oil for extra crisp. |
| Frozen uncooked | Up to 2 months | Bread the chicken first and place on a baking sheet in the freezer. Once frozen, transfer to a bag. When ready, bake at 400°F (200°C) for 25–30 minutes with slight time adjustment. |
Nutritional Information
| Nutrient | Amount per Serving |
|---|---|
| Calories | 280 |
| Protein | 20 g |
| Fat | 13 g |
| Carbohydrates | 19 g |
| Fiber | 1 g |
| Sugar | 2 g |
| Sodium | 430 mg |
Frequently Asked Questions
Can I use a different type of gluten-free flour?
Yes, you can use any gluten-free flour, such as rice, corn, or even chickpea flour. Just choose one with a fine enough grain and good browning capability. Avoid soy flour due to its high protein and strong flavor.
Can I fry these instead of baking them?
Absolutely. Simply heat a cast iron skillet or Dutch oven over medium-high heat with enough neutral oil to submerge the chicken. Fry each side for 1–2 minutes until golden and crisp. Fry in batches for even results.
Can I make the breading in advance?
The coating should ideally be done right before baking or frying to maintain crispness. However, you can prepare the cornflake mixture and flour mix ahead of time and store them in airtight containers for up to a week.
How do I know when the chicken is done without a thermometer?
At the ideal doneness, the chicken will be firm to the touch but still slightly elastic, not rubbery. If you cut into it, the interior should be opaque and clear in color.
Can I freeze unbreaded chicken for later use?
Freeze the chicken tender in a sealed bag without breading or coating. Use within 6 months. When you’re ready to use, thaw in the refrigerator and proceed with breading before baking or frying.
Conclusion
Gluten-Free Crispy Chicken Tenders offer an expertly balanced mix of savory, crunchy, and sweet flavors that bring restaurant-quality results directly to your home table. With clean, pork-free, and alcohol-free ingredients, this recipe is perfect for health-conscious eaters, allergy sufferers, or anyone who wants to enjoy a great meal without compromise. With the right ingredients and careful technique, these tenders deliver a satisfying, golden-brown coating that gives way to a tender, juicy center. Serve it with your preferred sauces and sides for a meal you won’t be able to stop eating.
Print Restaurant-style crispy chicken tenders made with gluten-free flour and crushed cornflakes, delivering a golden crunch and juicy center in a quick, easy process. A clean-eating-friendly recipe perfect for gluten-free diners. Chicken tenders Preheat oven to 400°F (200°C) For extra crispiness, place chicken tenders on a wire rack above the baking sheetGluten-Free Crispy Chicken Tenders for Clean Eaters
Ingredients
1 lb (450 g)
Gluten-free flour
1 cup (120 g)
Crushed gluten-free cornflakes
1 cup (50 g)
Eggs
2 large
Salt
1 teaspoon
Black pepper
1/2 teaspoonInstructions
Place gluten-free flour and crushed cornflakes in separate shallow bowls
Beat eggs in another shallow bowl
Season chicken tenders with salt and pepper
Dip tenders in flour, shaking off excess
Coat with beaten egg
Press into cornflake mixture to form evenly coated double-layered breading
Place on baking sheet lined with parchment paper
Bake for 15-20 minutes until golden and internal temperature reaches 165°F (74°C)
Let rest for 5 minutes before servingNotes
gluten-free cornflakes can be substituted with crushed gluten-free rice cakes or panko bread crumbs
Serve with regular or gluten-free ranch dressing for dipping