

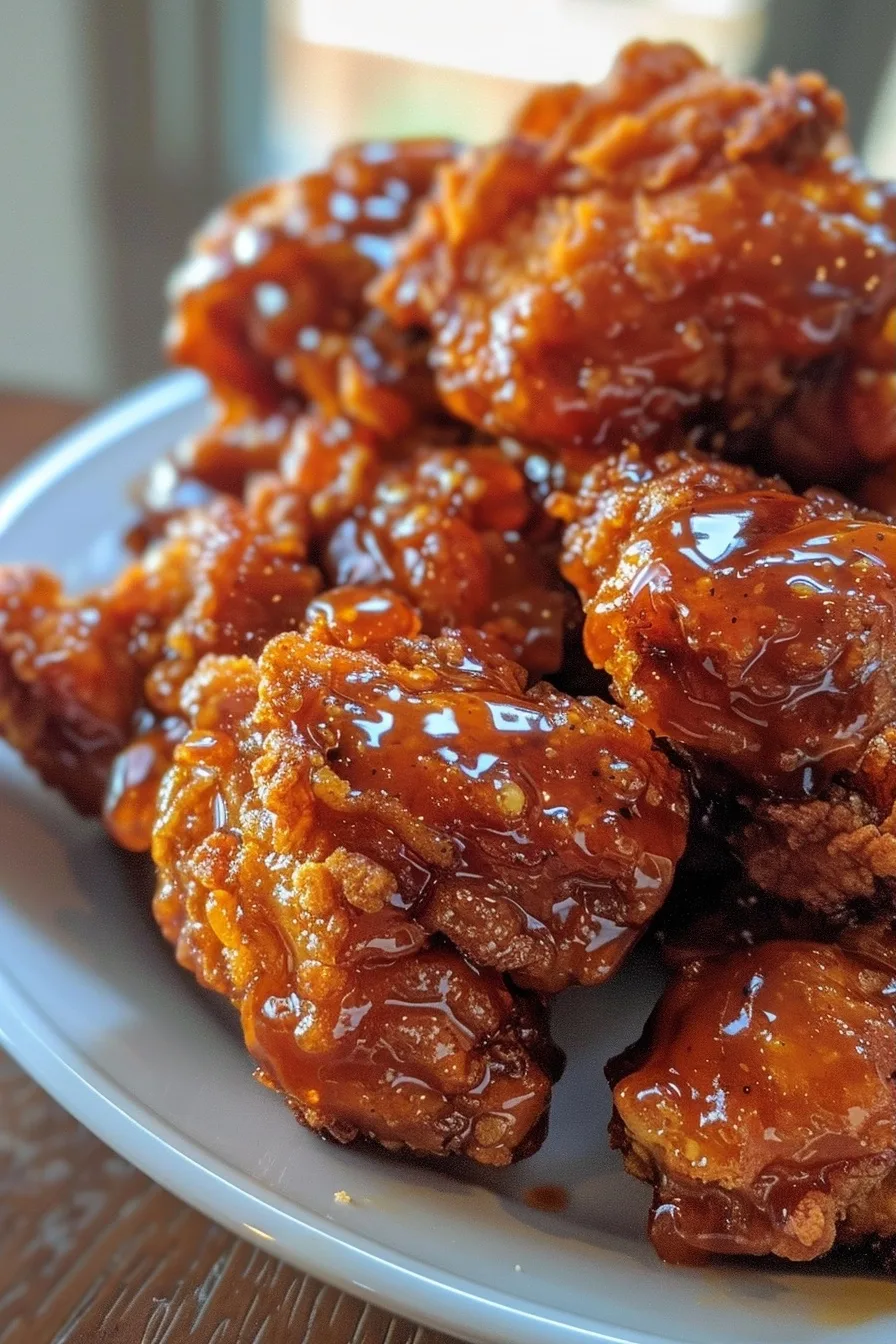
The Best Crunchy Baked Hot Honey Chicken is a revelation in weeknight dining, delivering shatteringly crisp coating and succulent chicken infused with a sweet yet fiery glaze, all achieved through smart baking techniques.
Why This Recipe Works
As a chef who’s spent decades perfecting textures and flavors, I can tell you that achieving that coveted crunch on baked chicken without frying is a science. The secret lies in a multi-pronged approach: the right breading, precise temperature, and optimal air circulation. Panko breadcrumbs, with their coarser, flakier structure, create more surface area for browning and crisping than traditional fine breadcrumbs. When combined with a well-executed three-stage dredge—flour for adhesion, egg wash as a binder, and panko for the final coating—you create a robust exterior that fries into crisp perfection in the oven.
The choice of baking temperature is crucial. A high heat, like 400°F (200°C), is essential for rapidly initiating the Maillard reaction on the panko coating and rendering out any residual moisture, preventing a soggy barrier. This intense heat also sears the chicken’s exterior proteins, locking in juices while the interior cooks gently to that safe and tender 165°F (74°C). Placing the chicken in a single layer on a greased or parchment-lined baking sheet is non-negotiable. This allows hot air to circulate freely around each piece, ensuring all sides achieve that beautiful, uniform crispiness without any part steaming itself into submission.
Finally, the hot honey glaze isn’t just an afterthought; it’s integrated at the right moment. Drizzling it over the chicken *after* it has achieved peak crispness prevents the sugars from burning during the long baking process and preserves the delicate balance of sweet heat. Warming the honey and hot sauce mixture slightly before application ensures it coats the chicken evenly, creating a glossy sheen and allowing the flavors to meld beautifully upon serving. This intentional layering of technique and timing is what transforms simple ingredients into an extraordinary culinary experience.
Ingredients
| Ingredient | Quantity | Notes |
|---|---|---|
| Boneless, Skinless Chicken Breasts | 4 large (about 2 lbs / 900g) | Pounded to about 3/4-inch thickness for even cooking. |
| Panko Breadcrumbs | 1 cup (approximately 100g) | Offers superior crunch compared to regular breadcrumbs. |
| All-Purpose Flour | 1/2 cup (approximately 60g) | For dredging, helps the egg adhere. |
| Large Eggs | 2 | Beaten well for coating. |
| Honey | 1/4 cup (approximately 85g) | A good quality, liquid honey is best. |
| Hot Sauce | 2 tbsp | Use your favorite variety (e.g., Frank’s RedHot, Cholula). Adjust to desired heat level. |
| Vegetable Oil or Canola Oil | 2 tbsp | For lightly greasing the baking sheet. |
| Salt | 1 tsp | Divided. |
| Black Pepper | 1/2 tsp | Freshly ground preferred. |
| Garlic Powder | 1 tsp | For the flour dredge. |
| Smoked Paprika | 1/2 tsp | Adds depth and color to the flour dredge. For a deeper smoky flavor without paprika, consider a tiny amount of concentrated liquid smoke designed for food. |
Step-by-Step Instructions
Preparation and Breading
-
Preheat your oven to 400°F (200°C). Lightly grease a large baking sheet with vegetable or canola oil, or line it with parchment paper for easier cleanup.
-
Prepare the chicken. If your chicken breasts are very thick, place them between two pieces of plastic wrap or in a sturdy resealable bag. Use the flat side of a meat mallet or a rolling pin to gently pound them to an even thickness of about 3/4-inch. This ensures uniform cooking and a better crust.
-
Set up your dredging station. In the first shallow dish, combine the all-purpose flour, 1/2 teaspoon of salt, black pepper, garlic powder, and smoked paprika. Whisk to blend.
-
In a second shallow dish, whisk the two large eggs until smooth.
-
In a third shallow dish, place the panko breadcrumbs. Season the panko with the remaining 1/2 teaspoon of salt.
-
Dredge the chicken. Working with one piece at a time, coat the chicken thoroughly in the seasoned flour mixture, shaking off any excess.
-
Next, dip the floured chicken into the beaten eggs, ensuring it’s fully coated. Let any excess egg drip off.
-
Finally, press the egg-coated chicken into the seasoned panko breadcrumbs. Ensure an even, generous coating on all sides. Gently press the panko onto the chicken to help it adhere.
Baking to Crispy Perfection
-
Place the breaded chicken pieces onto the prepared baking sheet, ensuring they have a little space between them for optimal crisping. A single layer is crucial; overcrowding will lead to steaming rather than crisping.
-
Bake the chicken in the preheated oven for 20-25 minutes. The exact time will depend on the thickness of your chicken. You’re looking for a golden-brown exterior and an internal temperature of 165°F (74°C) when probed with a meat thermometer. Consult a reliable source like the USDA Food Safety website for recommended cooking temperatures.
Hot Honey Glaze and Plating
-
While the chicken bakes, prepare the hot honey drizzle. In a small saucepan over low heat, combine the honey and hot sauce. “Heat” is the key word here; you don’t want to boil it, just warm it enough to make it easily pourable and to meld the flavors. Stir gently until well combined and slightly thinned.
-
Once the chicken is cooked through and crispy, remove it from the oven. Let it rest on the baking sheet for 2-3 minutes.
-
Drizzle the warm hot honey mixture generously over the baked chicken pieces. Ensure an even coating across the top.
-
Serve immediately to enjoy the unparalleled crunch and vibrant flavor profile.
Chef Tips for Perfect Results
-
Even Thickness is Key: Always pound chicken to an even thickness. This is fundamental for ensuring that the chicken cooks through uniformly without the thinner parts overcooking before the thicker parts are done.
-
Don’t Skip the Seasoning: Season every layer – the flour, the panko. This builds flavor from the outside in, preventing bland bites and ensuring a cohesive taste experience.
-
Pan Aeration: Use a wire rack set inside your baking sheet to allow air to circulate underneath the chicken. This is the closest you’ll get to frying results in the oven for ultimate crispiness on all sides.
-
Internal Thermometer is Your Best Friend: Rely on a digital instant-read thermometer to confirm doneness. For chicken, 165°F (74°C) is the target. Probing the thickest part of the breast is essential.
-
Quality Honey Matters: Use a liquid honey that’s easy to drizzle. If your honey is crystallized, gently warm it in a water bath until it’s liquid again. Avoid overheating, which can degrade its delicate floral notes.
-
Hot Sauce Nuance: The type of hot sauce you use will significantly impact the final flavor. A vinegar-based sauce offers tang, while a pepper-forward sauce brings more heat and fruitiness. Experiment to find your perfect match.
Common Mistakes to Avoid
-
Overcrowding the Baking Sheet: This is perhaps the most common error. When chicken pieces touch or are too close, they steam instead of crisp. The hot air cannot circulate effectively. Ensure ample space between each piece.
-
Using Fine Breadcrumbs: Standard breadcrumbs tend to absorb more moisture and create a softer coating. Panko’s larger flakes require less oil and bake up significantly crispier and lighter.
-
Applying Glaze Too Early: Coating the chicken in the honey mixture before baking can lead to burnt sugars and a gummy texture. Baking the chicken first and then glazing allows the crisp coating to remain intact.
-
Under- or Over-baking: Under-baking leaves the chicken unsafe and rubbery. Over-baking dries it out. A meat thermometer is the only way to guarantee perfect doneness, hitting that 165°F (74°C) internal temperature reliably.
-
Not Pounding Chicken Evenly: Uneven thickness is a recipe for disaster. Some parts will be dry and overcooked while others might still be undercooked. Pounding ensures even protein denaturation and moisture distribution during cooking.
Variations and Substitutions
| Ingredient | Substitution | Impact on Flavor/Texture |
|---|---|---|
| Panko Breadcrumbs | Crushed Corn Flakes (unsweetened) | Provides a similar crunch but with a slightly different, more rustic corn flavor. |
| Panko Breadcrumbs | Almond Flour or other nut flours (for a low-carb option) | Results in a less crispy texture, more of a savory crust. Flavor will be nuttier. Needs careful monitoring to prevent burning. |
| All-Purpose Flour | Gluten-Free All-Purpose Flour Blend | Maintains the coating structure with no significant flavor change for those avoiding gluten. |
| Honey | Agave Nectar or Maple Syrup | Agave offers a neutral sweetness. Maple syrup adds a distinct, complementary flavor. Both are good liquid alternatives. |
| Hot Sauce | Sriracha or other chili paste with a splash of apple cider vinegar | Provides heat and sweetness. The vinegar adds necessary acidity to balance the sweetness and mimic traditional hot sauce profiles. |
| Smoked Paprika | A drop of liquid smoke (food-grade) in the flour | Adds a smoky depth if you don’t have or wish to use smoked paprika. Use sparingly as it is concentrated. |
Serving Suggestions and Pairings
This Crunchy Baked Hot Honey Chicken is wonderfully versatile. For an upscale American meal, consider pairing it with a creamy celeriac mash, a vibrant lemon-garlic roasted asparagus, or a simple yet elegant quinoa pilaf with toasted nuts and herbs. These sides provide textural contrast and complementary flavors without overpowering the star dish. For a delightful non-alcoholic beverage, a sparkling apple cider, a crisp ginger beer, or a refreshing infused water with cucumber and mint would be excellent choices. This dish shines for casual family dinners, entertaining friends, or even as a sophisticated lunch option.
Storage and Reheating
| Method | Duration | Exact Technical Instructions |
|---|---|---|
| Refrigeration | 3-4 days | Allow chicken to cool completely before sealing in an airtight container. Store in the coldest part of your refrigerator. Do not store glazed chicken while still warm. |
| Reheating (Oven/Toaster Oven) | 10-15 minutes | Preheat oven to 350°F (175°C). Place chicken on a baking sheet, preferably on a wire rack, and reheat until warmed through and the coating regains some crispness. This method best preserves texture. |
| Reheating (Air Fryer) | 5-8 minutes | Set air fryer to 375°F (190°C). Place chicken in the basket without overcrowding. Reheat for a few minutes until crispy and heated. This is excellent for regaining crunch. |
| Freezing | Up to 1 month | Cool chicken completely. Wrap individual pieces tightly in plastic wrap, then place in a freezer-safe bag or container. Glaze can be stored separately and reapplied after reheating. |
Nutritional Information
| Nutrient | Amount per Serving (Approximate values) |
|---|---|
| Calories | 450 kcal |
| Protein | 35g |
| Fat | 15g |
| Saturated Fat | 3g |
| Cholesterol | 150mg |
| Carbohydrates | 40g |
| Fiber | 2g |
| Sugars | 20g |
| Sodium | 600mg |
Nutritional values are estimates and can vary based on specific ingredients and portion sizes.
Frequently Asked Questions
Can I use chicken thighs instead of breasts?
Yes, boneless, skinless chicken thighs are an excellent substitute. They are naturally more forgiving and harder to overcook. Adjust baking time as needed, aiming for an internal temperature of 170-175°F (77-79°C) for thighs, as they benefit from slightly higher temperatures for optimal tenderness.
My chicken isn’t crispy enough. What went wrong?
Lack of crispness is usually due to overcrowding the baking sheet, insufficient oven temperature, or applying the glaze too early. Ensure chicken pieces have ample space for air circulation, your oven reaches and maintains 400°F (200°C), and the glaze is added only after baking. Using panko breadcrumbs is also vital for maximum crispiness.
How can I tell if the chicken is cooked through without a thermometer?
While a thermometer is highly recommended for safety and accuracy, you can visually check. Pierce the thickest part of the chicken with a knife; the juices should run clear, not pink. The internal flesh should be opaque and white. However, cooking to an internal temperature of 165°F (74°C) guarantees safety and optimal texture.
Can I make the hot honey sauce ahead of time?
Yes, the hot honey sauce can be made a day or two in advance and stored in an airtight container at room temperature. Gently warm it before drizzling over the chicken to ensure it’s pourable and coats the pieces evenly. This simplifies the final assembly process.
Is this dish spicy? How can I adjust the heat?
The spice level depends entirely on your choice of hot sauce and the amount used. Start with the recommended 2 tablespoons and taste the mixture before glazing. For more heat, use a hotter hot sauce or increase the quantity. For less heat, opt for a milder sauce or reduce the amount, perhaps adding a tiny touch more honey to compensate for sweetness.
This Crunchy Baked Hot Honey Chicken represents the pinnacle of comfort food reimagined – a dish that marries textural excitement with bold, balanced flavors. Each bite offers a satisfying crunch followed by tender, juicy chicken, all coated in that irresistible sweet and spicy glaze. It’s proof that achieving restaurant-quality crispiness and incredible taste at home is entirely attainable with smart technique. The aroma of toasted panko and sweet-honeyed spice fills the air, promising a truly delightful meal.
PrintThe Best Crunchy Baked Hot Honey Chicken
Achieve shatteringly crisp oven-baked chicken with a homemade hot honey glaze. This no-fry method delivers sweet, fiery flavor and foolproof results for a quick weeknight meal.
- Prep Time: 15
- Cook Time: 30
- Total Time: 45
- Yield: 4 servings
- Category: Main dish
- Method: Baking
- Cuisine: American
- Diet: Gluten-free (verify hot sauce labels for gluten)
Ingredients
4 large boneless chicken breasts (about 2 lbs / 900g)
1 cup panko breadcrumbs
1/2 cup all-purpose flour
2 large beaten eggs
1/4 cup honey
2 tablespoons hot sauce (adjust for heat level)
1 tablespoon unsalted butter, melted (optional for glaze enhancement)
Vegetable oil spray or non-stick baking spray
Instructions
Preheat oven to 400°F (200°C)
Line a baking sheet with parchment paper or grease with oil spray
Pound chicken breasts to uniform 3/4-inch thickness
Set up a three-stage dredge: flour in one dish, beaten egg in another, and panko in a third
Dredge each chicken breast in flour, shaking off excess
Dip floured chicken into egg wash, ensuring full coating
Press coated chicken into panko for a thick, even crust
Arrange chicken in a single layer on prepared baking sheet
Bake for 15 minutes until golden and crisp
Meanwhile, whisk honey with hot sauce and melted butter (if using)
Carefully drizzle warmed glaze over baked chicken
Return to oven and bake 5-10 minutes until chicken reaches 165°F internal temperature
Notes
Pounding chicken ensures even cooking and avoids dried-out edges
Use parchment paper for easier cleanup
For extra crunch, rotate the baking sheet midway through cooking
Adjust hot sauce quantity based on spice preference
Store leftovers in refrigerator for up to 3 days