

Pan-fried chicken breast is a lean, flavorful, and versatile dish that combines a golden-brown crust with tender, juicy meat. This method uses hot oil, seasoned flour, and precise heat control to lock in moisture while creating a rich caramelized exterior—no brining, no marinating, just straightforward kitchen science.
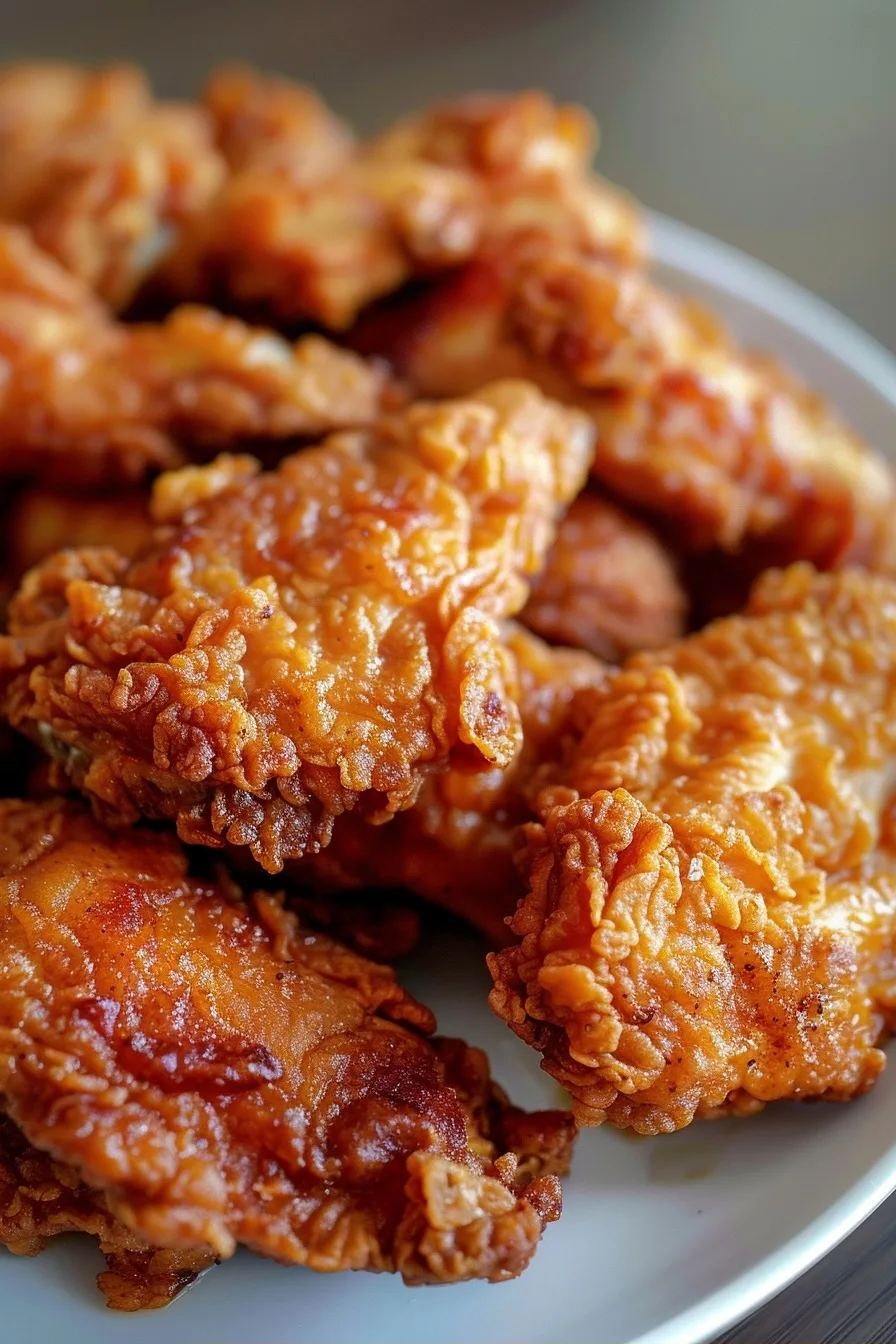
Recipe Overview
| Prep Time | 10 minutes |
|---|---|
| Cook Time | 15 minutes |
| Total Time | 25 minutes |
| Servings | 2 |
| Difficulty | Moderate |
| Cuisine | American |
Why This Recipe Works
The secret to juicy pan-fried chicken lies in three principles: dry surface contact, starch encapsulation, and controlled thermal dynamics. Let me break it down.
First, patting the chicken breasts dry removes surface moisture, which is crucial for initiating the Maillard reaction. This browning phenomenon forms complex flavor compounds at 300°F (150°C)—the same principle behind seared steaks and toasted nuts. Without dry skin, you’re left with greasy, steamed chicken instead of a crisp crust.
Second, the flour coating acts as a protective jacket for the proteins beneath. By seasoning it with paprika and garlic powder, we layer in smoky depth and aromatic compounds that intensify as the starches gelatinize. The 1/2-inch thickness of standard chicken breasts means precise oil temperature management is essential to avoid overcooking while achieving that crust.
Third, using only 2 tablespoons of oil—enough to shallow-fry without submerging—creates a balance between searing heat and controlled fat absorption. The result? A 25-minute cook time that locks in moisture while crisping the exterior at the cellular level.
Ingredients
| Ingredient | Quantity | Notes |
|---|---|---|
| Chicken breast | 2 (150g each) | Fresh, skinless, trimmed to even thickness |
| All-purpose flour | 1/2 cup (60g) | Damaged starches create craggier crust |
| Paprika | 1 tsp (2g) | Smoked variety adds depth |
| Garlic powder | 1/2 tsp (1g) | Prevents garlic from burning |
| Vegetable oil | 2 tbsp (30ml) | High smoke point, neutral flavor |
Step-by-Step Instructions
Prep Work
Combine flour, paprika, and garlic powder in a shallow bowl. This pre-mix ensures even seasoning without clumping.
-
Pat chicken breasts dry with paper towels. Use a meat mallet to gently flatten to 1/2-inch thickness for even cooking.
-
Heat oil in a heavy skillet over medium-high flame (300°F/150°C on a calibrated thermometer). A cast-iron or stainless steel pan maintains heat consistency.
-
Dredge each breast in the flour mixture, shaking off excess. Work quickly to avoid moisture reaccumulating on the surface.
-
Carefully place chicken in the pan. Do not crowd—use two separate pans if needed. Sear 5-7 minutes per side, rotating 90° for even browning.
-
Insert an instant-read thermometer into the thickest part: 165°F (74°C) indicates fully cooked. Let rest 5 minutes before slicing to retain juices.
Chef Tips for Perfect Results
-
Preheat oil to 300°F (150°C) for consistent browning. Too cold creates greasy chicken; too hot burns the crust without cooking the interior.
-
Use a digital thermometer: the USDA’s food safety guidelines confirm 165°F (74°C) is the minimum safe temperature.
-
Flour sticks better when chicken is at room temperature. Remove it from fridge 20 minutes before cooking.
-
After flipping, reduce heat to medium if browning is too aggressive. Precision cooking prevents overdone edges.
-
Serve immediately after resting. Juicy chicken breasts release moisture quickly when left warm for extended periods.
Common Mistakes to Avoid
-
Mistake: Not drying the chicken before dredging. Excess moisture prevents Maillard browning. Fix: Use paper towels to absorb surface liquid.
-
Mistake: Using olive oil. Its low smoke point (375°F/190°C) breaks down at the frying temperature needed (300°F/150°C). Fix: Use canola or corn oil for stability.
-
Mistake: Opening the kitchen window during cooking. Drafts disrupt heat distribution in your pan. Fix: Keep air circulating but not turbulent.
-
Mistake: Cutting chicken too early. Proteins contract and expel juices if cut before resting. Fix: Use a warm platter and cover with foil.
Variations and Substitutions
| Ingredient | Substitution | Impact |
|---|---|---|
| All-purpose flour | Breadcrumbs (panko or Italian) | Creates crunchier texture, absorbs less oil |
| Garlic powder | Fresh garlic (1 clove minced) | Adds raw garlic flavor, may burn if not added to oil first |
| Paprika | Old Bay seasoning (1/2 tsp) | Enhances umami notes while staying alcohol-free |
| Vegetable oil | Clarified butter | Imparts richer flavor but requires lower heat to prevent burning |
Serving Suggestions and Pairings
Elevate this chicken breast with upscale, non-alcoholic pairings:
-
Vegetables: Roasted asparagus with lemon zest or creamed spinach with nutmeg
-
Grains: Herbed quinoa pilaf or garlic mashed potatoes
-
Drinks: Sparkling elderflower tea or a cold coconut water with mint
Storage and Reheating
| Method | Duration | Instructions |
|---|---|---|
| Refrigerator | 3 days | Store in airtight container with parchment layers between breasts |
| Freezer | 1 month | Wrap in aluminum foil and place in vacuum-sealed bag |
| Reheating | 15 minutes | 350°F (180°C) oven to maintain crust integrity |
Nutritional Information
| Nutrient | Amount per Serving |
|---|---|
| Calories | 320 |
| Protein | 45g |
| Fat | 10g |
| Carbohydrates | 10g |
| Fiber | 0.5g |
| Sugar | 0g |
| Sodium | 600mg |
Frequently Asked Questions
Can I use self-rising flour instead of all-purpose?
Self-rising introduces leavening agents that alter the structure. The crust will be lighter but less crunchy. For exact results, stick to all-purpose.
How do I know when the chicken is done besides using a thermometer?
The juices should run clear and firm the flesh will appear opaque with no pink. But note the USDA recommends a thermometer for accuracy.
What if my chicken sticks to the pan?
Ensure it’s properly dried and the oil is hot enough (300°F/150°C). If stuck, let it cook undisturbed for an extra 30 seconds before lifting carefully.
Can I freeze the cooked chicken?
Absolutely. Double-wrap in foil and freeze for up to 3 months. Reheat at 350°F (180°C) directly from frozen, adding 2-3 minutes to warm through.
Should I use a nonstick pan?
A heavy stainless steel or cast-iron skillet offers better heat distribution and flavor development. Nonstick pans often restrict high-temperature cooking due to coating limitations.
Conclusion
With this method, you’ll master the culinary balance between crust and juiciness. Each bite delivers a smoky, golden-first impression, followed by tender meat that melts on the tongue. Perfect with a squeeze of lemon or a sprinkle of fresh parsley to highlight the natural richness. Whether it’s a weeknight dinner or a dinner party surprise, you’re now equipped to transform simple ingredients into a restaurant-worthy masterpiece—all from your own kitchen.
PrintEasy Fried Chicken Breast (Juicy Pan Fried)
Lock in moisture and create a golden-brown crust with this American-style pan-fried chicken breast. Using seasoned flour and precise heat control, this quick recipe yields tender chicken with a textured, smoky-herb finish. Requires 25 minutes total and no complicated prep.
- Prep Time: 10
- Cook Time: 15
- Total Time: 25
- Yield: 2 servings
- Category: Main dish
- Method: Pan Frying
- Cuisine: American
Ingredients
2 large chicken breasts (150g each), skinless and trimmed
1/2 cup all-purpose flour (60g)
1 tsp smoked paprika (2g)
1/2 tsp garlic powder (1g)
2 tbsp vegetable oil (30ml)
Instructions
Pat chicken breasts dry with paper towels
Use a meat mallet to gently flatten to 1/2-inch thickness
Combine flour, paprika, and garlic powder in a shallow bowl
Heat 2 tbsp vegetable oil in a heavy skillet (cast-iron or stainless steel) over medium-high flame until stable at 300°F
Dredge each breast in the flour mixture, shaking off excess
Place in skillet and fry undisturbed until deep golden brown, ~5 minutes per side
Reduce heat to medium and cook 2-3 minutes until fully done
Season generously with flaky sea salt immediately after cooking
Notes
Use a cast-iron skillet for best heat retention
Don’t overcrowd the pan; fry in batches if needed
Salt after cooking prevents the crust from dissolving
For extra juiciness, let chicken rest 5 minutes before serving